

You're on a roof or in the shop, panels are staged, the crew is waiting, and the screw in your hand suddenly doesn't look right for the steel in front of you. That's usually when the delay starts. The point won't bite, the threads strip, the head cams out, or the washer gets crushed before the panel is seated.
That problem costs more than a bucket of wrong fasteners. It burns labor, slows the install, and creates callbacks if the screw seals badly or never gets proper grip in the substrate. Metal self tapping screws aren't a small purchasing detail. On roofing and cladding work, they decide whether the job moves cleanly or turns into rework.
Table of Contents
- Choosing the Right Screw Is Not Just a Detail
- Understanding Fastener Fundamentals
- Self Tapping vs Self Drilling The Core Decision
- Selecting the Right Screw Material and Coating
- Anatomy of a Roofing Screw Head Drive and Washer
- Sizing for Success Load and Pullout Strength
- Installation Guide to Avoid Common Failures
- Making the Right Choice for Your Metal Project
Choosing the Right Screw Is Not Just a Detail
A lot of fastener mistakes start with a simple assumption. Someone sees thin metal on the plans, grabs a common screw, and expects it to work everywhere on the job. Then the base steel changes, the panel stack-up changes, or the installer moves from a forgiving condition into one where strip-out becomes the significant risk.
On roofing jobs, the wrong screw usually fails in a predictable way. It spins instead of seats. It walks across the panel rib. It drives too aggressively and damages the sealing washer. Or it gets enough bite to look finished, then loosens because the thread choice never matched the substrate.
The screw choice has to match the metal in front of you, not the label you used on the last project.
That's the practical rule contractors rely on. If you know how to separate self-tapping from self-drilling, how diameter affects strip-out risk, and how installation technique changes the result, you avoid most field problems before the first panel is fastened.
Understanding Fastener Fundamentals
A self-tapping screw is defined by what it does during installation. It taps its own hole as it is driven into the material. That's the historical distinction that matters in the field, especially in sheet metal and other thinner materials where separate tapping would slow the work down. Technical guidance also notes that performance varies by material, diameter, and thread profile, and one reference cites typical holding power of about 80 to 100 pounds, depending on the installation and conditions, in the self-tapping screw reference.

What self-tapping means on a real job
In practical terms, metal self tapping screws form threads as they go in. That makes them useful when you already have a pilot hole or when the application calls for controlled placement rather than maximum drilling speed. In roofing and light metal fabrication, that control can matter as much as raw speed.
If you want a broader primer on roofing fastener types and material choices, Contractor's Den has a useful guide on understanding metal roofing screws types and materials.
The three terms people mix together
Contractors and DIY users often lump these together, but they are not the same:
- Self-tapping screws cut or form threads as they're driven into the material.
- Self-drilling screws add a drill-point style tip so they can create their own hole before threading.
- Sheet metal screws is a broader jobsite term. It often describes screws used in thin metal, but the exact point style and installation method still matter.
The confusion usually shows up when an installer expects a self-tapper to behave like a self-driller. That's where jobs bog down. The screw isn't defective. It's being asked to do the wrong job.
Self Tapping vs Self Drilling The Core Decision
This is the question that causes the most wasted time in metal roofing. People hear “self-tapping” and assume it means “no prep required.” In the field, that shortcut causes most of the frustration.
Independent instructional guidance points out that many user questions confuse self-tapping with self-drilling screws, and the primary gap is the decision rule for steel gauge, panel thickness, base metal, and drive technique, as explained in this field video on self-tapping versus self-drilling decisions.
| Criterion | Self-Tapping Screws | Self-Drilling Screws |
|---|---|---|
| Pilot hole | Usually used where a pilot hole is already present or planned | Designed to create their own pilot hole |
| Best use case | Controlled placement, existing hole alignment, thread formation in suitable material | Faster installation where drilling and fastening happen in one step |
| Jobsite speed | Slower if you must predrill every location | Faster in production-style installs |
| Typical failure when misused | Won't bite properly if asked to drill what it was not meant to drill | Can walk or misalign if rushed at the start |
| Contractor decision rule | Use when hole location is critical or prep work is already part of the sequence | Use when substrate and screw point are matched for direct entry |
The practical rule contractors use
If the screw needs to make its own hole through the metal stack, start by looking at a self-driller. If the hole already exists, or you need precise alignment through a prepped opening, a self-tapper may be the cleaner choice.
That sounds simple, but steel thickness changes the answer. Thin panel-to-substrate fastening often rewards a good self-driller because it reduces steps. Harder or thicker material punishes the wrong point style fast. A screw that works fine in a light condition can stall, burn up bits, or strip out once the steel gets less forgiving.
Practical rule: Choose the screw by substrate and entry method first. Choose by habit last.
Where crews get into trouble
The biggest mistake is treating all metal as if it drills the same. It doesn't. Point geometry, pressure, and the base material all change the result. If the crew is moving from basic startup fastening into conditions where strip-out becomes more likely, sizing and thread engagement margin matter more than installation speed.
That's why roofing specs often become more specific than installers expect. For example, Low Slope - TRUFAST - #15 E.H.D ROOFING FASTENERS - Per Bucket is described as a truss head roofing screw engineered for lap attachment to corrugated steel 18 – 22 ga. and wood substrates in higher wind uplift roof assemblies, with a #2 double flute self-drilling point and tapered entry thread design. That's a useful example of a screw selected for a defined substrate range and fastening condition, not a one-size-fits-all choice.
Speed versus control
Self-drillers usually win when the job rewards fewer steps. Self-tappers still have a place when the hole pattern is established, alignment has to stay exact, or the application calls for controlled thread formation instead of aggressive drilling.
The right answer is rarely “always use one type.” The right answer is knowing what the steel will allow, and what the assembly demands once the screw seats.
Selecting the Right Screw Material and Coating
The point and threads get most of the attention, but on an exterior metal job the screw material and coating often decide how the fastener ages. A screw can install cleanly on day one and still become the weak link later if its corrosion resistance doesn't match the environment.

Strength and corrosion are a trade-off
In basic terms, contractors usually weigh two things:
- Carbon steel gives you a familiar strength profile and is common across roofing fasteners.
- Stainless steel is often the better fit when corrosion resistance is the first concern.
- Coated fasteners try to bridge the gap by protecting the base metal in exposed conditions.
What works depends on the roof location, the panel material, and how exposed the fastener will be to weathering. Matching metals and finishes matters. If you ignore that, you may not notice the mistake until rust staining or premature fastener deterioration shows up around the head.
Don't separate the screw from the environment
A roof near salt exposure, frequent moisture, or harsh weather needs a different conversation than an interior metal assembly. In those situations, stainless options often come up for good reason. Contractors comparing exposed-fastener options can review a product example like this 316 stainless #14 truss head roofing screw to evaluate whether the material class fits the environment they're working in.
The right coating and material choice isn't glamorous, but it prevents the kind of callback nobody wants. A roof can tolerate a lot. Constant corrosion at the fastener line isn't one of those things.
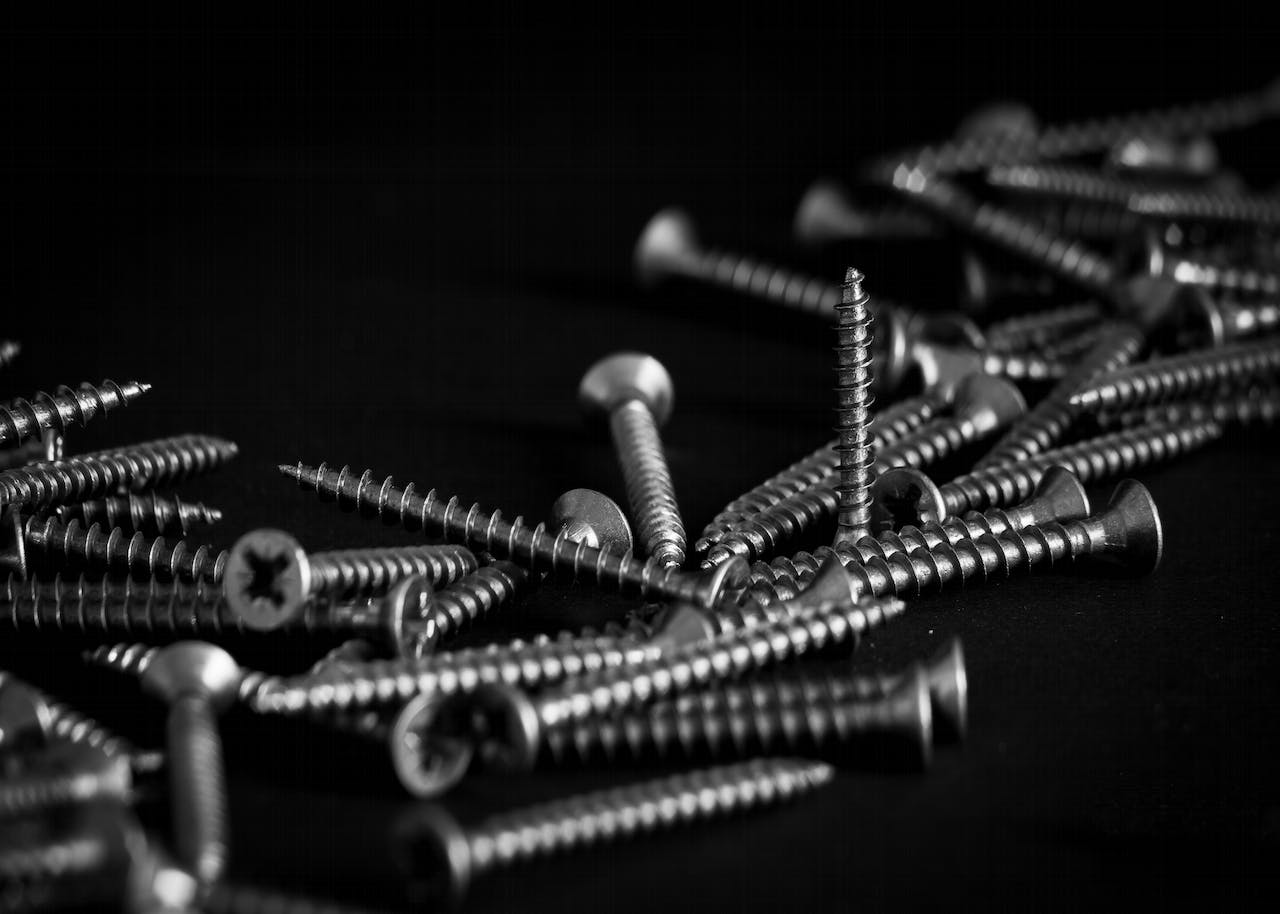
Anatomy of a Roofing Screw Head Drive and Washer
Head design changes how a screw installs. Drive style changes how often the bit slips. Washer quality decides whether the roof stays sealed. Those are not separate issues on a metal roof. They all show up at the same moment when the screw seats.

Why head height and drive engagement matter
In steel substrates, point geometry and head design affect performance during installation. An independent technical sheet reports that a High Hat head provides 28% more head height, improving tool engagement, reducing cam-out, and increasing tool life during installation, according to the TEKS fastener technical data sheet.
That matters more than many crews realize. Better bit engagement means fewer slips on painted panels, less chewed-up recess damage, and less installer fatigue over a long day. On repetitive roofing work, a cleaner drive interface saves time because the crew spends less effort correcting bad starts and replacing worn bits.
Head style does a specific job
Different head styles solve different problems:
- Hex washer heads are common where installers want strong wrench or socket engagement.
- Truss or pancake styles help when a broader bearing surface or lower profile makes more sense.
- Drive recess choice affects whether the bit stays planted or wants to climb out under pressure.
Washer choice belongs in the same conversation. On exposed fastener metal roofs, the sealing washer is what stands between a proper seat and a leak path. If the washer is under-compressed, the seal is incomplete. If it's crushed, the assembly may be damaged before the crew moves on.
Contractors working through those details can compare common practices in this guide on when to use washers and when not to use washers.
A short visual refresher helps here:
A roofing screw is only as good as the contact it makes at the head, the drive, and the seal.
Sizing for Success Load and Pullout Strength
Diameter is not just a catalog detail. It changes how much margin you have before the substrate strips, especially when conditions are less than ideal. In roofing and cladding work, that margin often decides whether the fastener bites cleanly or spins out near the end of the drive.
Experts commonly specify a larger-diameter #17 self-tapping screw when the application shifts into higher-risk strip out conditions, while ¼-inch diameter screws are recommended for startup roofing and cladding work, as outlined in the SFS guide to self-tapping metal screws.
What size choice really means in the field
That guidance tells you something important. Size selection is tied to risk, not just convenience. The smaller diameter is often fine when the condition is straightforward and startup entry is the main concern. The larger diameter becomes useful when the installer needs more pullout resistance and more thread engagement margin.
A simple sizing mindset
Use this approach when you're choosing among metal self tapping screws:
- Standard startup work: Follow the smaller recommended diameter where the application supports it and entry is the main challenge.
- Higher strip-out risk: Move to the larger-diameter option when the substrate condition, loading, or jobsite experience says the hole may not hold as cleanly.
- Length selection: Make sure the screw is long enough to achieve proper engagement in the receiving material without assuming more length automatically fixes a weak match.
- Thread match: The thread profile has to suit the substrate. Diameter alone won't rescue a poor thread choice.
A bigger screw is not always a better screw. It's better when the condition calls for more holding margin.
Installation Guide to Avoid Common Failures
Most fastener problems blamed on the screw are really installation problems. The point may be fine. The threads may be right. But if the driver starts too fast, the metal isn't clamped, or the installer keeps pushing after the screw is seated, the assembly can still fail.
Instructional guidance notes that slow starts, firm pressure, clamping pieces together, and stopping when the screw is tight are key to avoiding stripped threads and lost strength. The same guidance also notes that for thick steel, specialized self-drillers are needed for material up to 1/2 inch thick, as covered in this installation-focused fastener video.

What to do on the roof
Good crews do a few things consistently:
- Start slow: A controlled start keeps the point from skating across the panel.
- Keep pressure steady: Firm pressure helps the point engage instead of polishing the surface.
- Clamp loose pieces: If the materials can move, the screw may never track straight into the assembly.
- Stop at seated tight: Once the screw is properly seated, more torque usually hurts the result.
What causes the common failures
These are the issues that show up over and over:
- Walking on the surface: Usually comes from a rushed start, weak pressure, or unstable material.
- Cam-out: Often tied to poor bit fit, worn bits, or head designs that don't hold engagement well.
- Stripped threads: Common when the installer keeps driving after the screw has already seated.
- Snapped heads: Often the result of forcing the wrong screw into a condition beyond its intended use.
If a screw won't bite, don't assume more speed will fix it. Usually the fix is better pressure, better alignment, or a different screw type.
Leaks often trace back to installation technique too, especially at the washer. Contractors troubleshooting those callbacks can review common causes in this guide to metal roofing screws leaking.
Making the Right Choice for Your Metal Project
Choosing metal self tapping screws gets easier when you treat it like a field checklist instead of a catalog exercise. Start with the substrate. Ask whether the screw needs to drill, tap, or do both. Then look at the risk of strip-out, the exposure conditions, and the head and washer design needed for a clean, sealed installation.
If the steel is thin and speed matters, a matched self-driller often makes sense. If alignment is controlled by an existing hole or the application calls for thread formation into a prepared opening, a self-tapper may be the better fit. Don't overlook coating, stainless versus carbon steel, and washer quality. Those details decide how the assembly holds up after the crew leaves.
For contractors comparing roofing systems and fastener requirements across panel types, this guide on what type of metal roofing to choose is a useful next step.
Contractor's Den helps contractors, builders, and serious DIY buyers source roofing fasteners, accessories, and related metal roofing components with practical product selection support. If you need to match a screw to steel thickness, roof type, or installation method, browse Contractor's Den and use the Learning Center to narrow the choice before the next job starts.