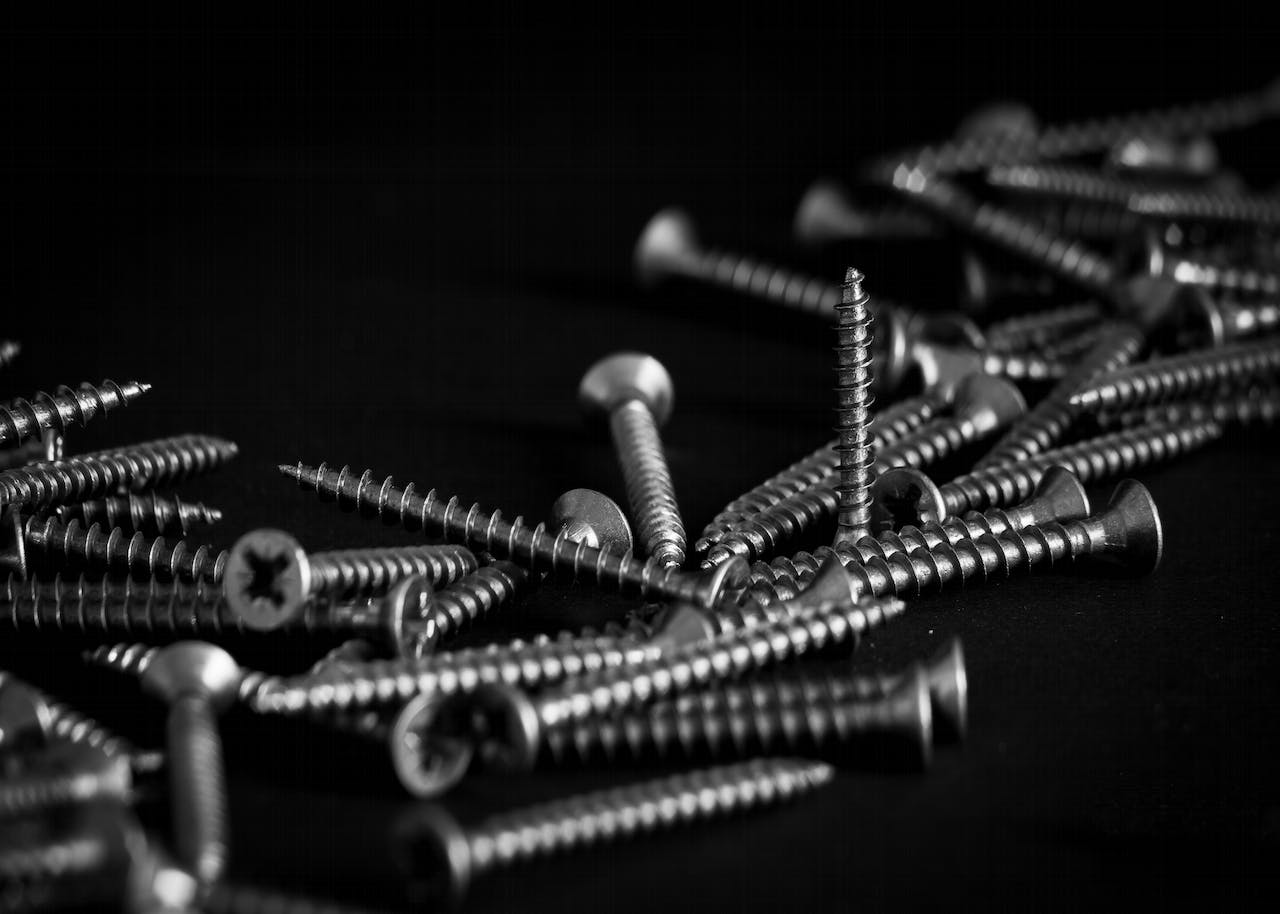


You're often not thinking about pancake screws until something goes wrong. A panel won't sit flat. A clip rocks when you tighten it. A sudden rain shows a tiny leak where everything looked fine an hour earlier. That's usually the moment installers realize the screw choice wasn't a minor detail. It was part of the roof system.
Pancake screws for metal roofing matter because they solve a very specific problem. In concealed-fastener assemblies, you need a fastener that holds components securely without creating extra height, panel distortion, or interference under overlapping seams. Used correctly, they help preserve waterproofing. Used in the wrong place, they can create failure points that don't show up until wind, water, or thermal movement tests the roof.
If you work on standing seam, nail strip, or low-profile metal assemblies, this is one of those details worth slowing down for. Contractors dealing with regional weather exposure often see how fastener selection affects the whole assembly, especially on projects where uplift resistance and water control matter. For a local example of how system-specific metal roofing work is approached in practice, this Colorado Springs metal roof installation resource is useful context.
Table of Contents
- Introduction to Pancake Screws for Metal Roofing
- Understanding Core Concepts and Use Cases
- Key Factors in Material Coating and Size Selection
- Ensuring Compatibility with Roofing Panels and Substrates
- Installation Best Practices for Pancake Screws
- Common Mistakes to Avoid and Troubleshooting
- Ordering Specifications and Bulk Quoting Tips
- Conclusion and Key Takeaways
Introduction to Pancake Screws for Metal Roofing
A contractor sets a standing seam panel, fastens the concealed points, and the roof looks clean upon completion. Six months later, the callbacks start. A panel oil-cans near the clip. A sidelap shifts. A leak shows up where the metal was never supposed to be under stress in the first place. The fastener looked minor, but the wrong head style, spacing, or drive pressure changed how the whole assembly behaved.
Pancake screws are built for places where a standard raised head can interfere with the metal above it. Their low, wide head helps keep clips, concealed trim pieces, and other low-clearance connections from creating a bump under the panel. A simple way to picture it is pressure through a snowshoe versus pressure through a boot heel. The connection stays flatter, and that flatter connection often makes the difference between a panel that seats correctly and one that carries hidden stress.
That hidden stress is the part many guides skip. Pancake screws do more than hold metal in place. They influence how evenly force is spread, how cleanly parts nest together, and whether the roof keeps water moving where it belongs instead of giving it a path through a distorted connection. If the screw is overdriven, underdriven, or used where a different fastener was specified, the mistake may stay invisible until expansion, contraction, or wind load starts working on the assembly.
This matters on real jobs, from new builds to retrofit work and regional projects such as Colorado Springs metal roof installation, where long-term performance depends on matching the fastener to the panel system instead of treating every roofing screw as interchangeable.
If you need a broader primer before getting into pancake-specific details, this guide to metal roofing screw types and materials helps frame where pancake heads fit within the larger fastener category.
One caution up front. A pancake screw is not a universal substitute for every metal roofing fastener. Used in the right concealed or low-clearance location, it helps the system sit and perform as intended. Used in the wrong location, it can reduce bearing where the assembly needed more support, which raises the chance of movement, pull-out, deformation, and water entry over time.
Understanding Core Concepts and Use Cases
The easiest way to understand pancake screws for metal roofing is to compare them to a furniture glide under a chair leg. The purpose isn't just fastening. It's spreading load across a broader area while keeping the profile low.

What makes a pancake screw different
Pancake-head screws typically use a large, low-profile bearing surface of about 0.500 to 0.562 inches in diameter, which distributes clamping force across a wider area than standard raised heads on thin-gauge metal panels ranging from 0.018 to 0.040 inches, as shown in Triangle Fastener's pancake head specification sheet. In plain terms, they press more like a palm than a fingertip.
That matters because metal roofing moves. It expands and contracts. It also shows distortion easily. A broad head helps reduce localized stress, which lowers the chance of visible panel deformation and helps the connection stay flatter.
If you want a wider overview of how pancake, hex, and other fastener styles fit together, this guide to metal roofing screw types and materials is a solid companion read.
Where they work well and where they don't
Pancake screws are suited to concealed-fastener tasks such as clip attachment and sidelap stitching. They're also used where overlapping seams need the fastener head to remain unobtrusive rather than proud of the surface.
What they are not for is just as important. Mid Florida Metal Roofing Supply's guide on pancake head versus hex head washer types makes a critical point: pancake heads are engineered for concealed fastener systems and not for meaningful thread bite into structural framing for panel-to-deck attachment. That's where many failures begin. An installer uses a pancake screw where a structural panel fastener belongs, the head sits nicely, and the mistake stays hidden until load conditions increase.
If the connection's main job is structural panel attachment, don't let a clean low profile fool you into using the wrong fastener type.
Key Factors in Material Coating and Size Selection
A pancake screw can look perfect on install day and still create trouble years later. The hidden risk is not usually the head profile alone. It is the mismatch between coating, screw size, spacing intent, and installation torque. Get those wrong, and corrosion starts early, threads lose holding power, or the head distorts the panel connection enough to invite water into a system that once looked clean and flat.

Choosing by environment
Coating choice starts with exposure. Inland projects with mild moisture exposure often use plated carbon steel fasteners, while coastal, industrial, and high-humidity jobs push many installers toward higher-corrosion-resistance options such as stainless or specialty-coated fasteners. The point is simple. A screw is a small part, but once its coating breaks down, rust can stain panels, weaken the connection, and reduce long-term weather resistance at the fastening point.
Coating works like the outer shell on a jobsite jacket. If the shell fails, the layer underneath takes the hit.
That is why local exposure rules matter before you order. Contractors working in stricter coastal jurisdictions should review this Miami-Dade guide to corrosion-resistant screws, especially when approvals, salt air, and service life all shape the spec. For a broader comparison of how protective finishes are weighed in other heavy-duty applications, this guide to galvanizing costs for trailer fleets gives useful context.
One more field reminder. Coating selection and torque are tied together. Overdriving a screw can damage the finish at the head or threads, which shortens the life of even a well-chosen fastener.
Choosing by diameter and count planning
Diameter selection is really load-path selection in disguise. A small change in screw size affects pull-out behavior, shear capacity, drill performance, and how the fastener seats in clips or thin overlapping metal.
Western States Metal Roofing's fastener guide notes that #9 and #10 are common pancake screw diameters for metal-to-wood fastening, while some contractors move to larger sizes in heavier-load conditions. The same guide also recommends building in a 10% waste allowance on bulk orders.
That waste factor matters in the field. Screws get dropped in gravel, stripped during mis-drives, or set aside after a driver bit slips and damages the recess. A takeoff with no cushion assumes perfect torque, perfect alignment, and no changes at the roof edge. Real crews do not get that kind of jobsite.
The same source provides a useful estimating formula:
Screws per 100 sq ft = (Panel Width ÷ Screw Spacing) × (100 ÷ Panel Length) × Purlin Count
Use the formula as a starting point, then adjust for the actual attachment detail your panel system requires. A clip-heavy layout, sidelap stitching, or high-wind edge zones can change the count fast. More screws are not always better, either. If spacing gets tighter than the system calls for, the panel can lose some of the movement it needs during thermal expansion and contraction, and that can show up later as oil canning, slot stress, or fastener fatigue.
One catalog example that fits this category is #10 Pancake - 300 Series Stainless Steel - Metal to Wood. Based on the product snapshot, it is a #2 Square head, 300 Series Stainless Steel fastener designed to fasten standing seam clips for metal-to-wood connections. That is a relevant match when the assembly calls for a pancake head in a concealed clip-fastened system, and when corrosion resistance is part of the decision instead of an afterthought.
Ensuring Compatibility with Roofing Panels and Substrates
A roof can look right on install day and still develop leaks years early because the screw, panel, and substrate were never working as one system. That is the hidden risk with pancake screws. The head may sit flat and clean, but if the screw type, spacing, or drive condition does not match the panel and the structure below, waterproofing and long-term movement control start to break down.
Match the screw to the panel system first
Pancake screws are usually specified for concealed-fastener assemblies, especially standing seam clips and some nail strip details. Their low-profile head helps the panel or clip sit flat without interference. On exposed-fastener panels, that same low head often does not provide the sealing approach the assembly needs, so using a pancake screw there can create a mismatch even if the threads still bite.
A simple way to judge compatibility is to ask what has to happen above and below the fastener. Above the screw, the panel or clip needs to sit flat, move as designed, and stay dry. Below the screw, the threads need to hold in the actual substrate, whether that is wood decking, purlins, or light-gauge steel. If one side of that equation is wrong, the screw can become the weak link.
Substrate selection changes the answer fast. A metal-to-wood connection needs a thread and point style that can grab wood fibers without splitting or under-holding. A metal-to-metal connection may need a different point geometry and often a different diameter so the fastener cuts and holds correctly in steel. Product families such as TRUFAST fasteners for metal roofing applications are useful for comparing those system-fit differences before a crew places an order.
Panel profile and attachment detail affect spacing
Spacing is not just a counting exercise. It controls how the panel is held, how clips resist uplift, and how the roof handles expansion and contraction through heat and cold cycles.
Nail strip and clip-fastened systems often call for different spacing patterns depending on panel profile, support layout, and project exposure. Edge and corner zones may need tighter attachment than broad interior roof areas because wind pressure is not uniform across the roof. The wrong spacing can create two opposite problems. If screws are too far apart, clips or fastening strips can shift more than intended under wind load. If screws are packed too tightly, the panel may lose some of the movement it needs, which can show up later as slot stress, oil canning, or fatigue around the fastener line.
| Compatibility check | What to confirm | Why it affects performance |
|---|---|---|
| Panel type | Concealed-fastener clip system, nail strip, or exposed-fastener panel | The head style has to match how the panel seats and seals |
| Substrate | Wood deck, wood purlin, or metal support | Thread design and point style must match the material below |
| Fastening pattern | Clip spacing, strip spacing, and wind-zone adjustments | Layout affects uplift resistance and panel movement |
| Drive condition | Proper seating without stripping or overdriving | Bad torque can reduce holding power and distort the attachment point |
For a small outbuilding or open-frame structure, this same compatibility check still applies. A panel that works well on a house roof may need a different fastening approach over lighter framing. The carport roofing material guide is a useful reference for thinking through panel and support conditions on that type of project.
A pancake screw can be correct by shape and still fail the assembly by application. Long-term waterproofing depends on the match between panel profile, substrate, spacing, and torque, not on the screw head alone.
Installation Best Practices for Pancake Screws
A roof can look clean on day one and still be set up for trouble if the pancake screws were driven with the wrong angle or clamping pressure. That is the hidden risk with these fasteners. The head sits low and tidy, so small installation errors are easy to miss until a clip loosens, a panel shifts, or water starts finding a path where the assembly was supposed to stay tight.
Early in the process, visual guidance helps. This workflow graphic is a useful reference for crew training and punch-list review.

A clean installation sequence
Start by treating each screw location like a load-transfer point, not just a place to sink hardware. With pancake screws, the goal is controlled clamping. The screw should pull the clip or fastening strip down firmly without twisting it, skidding off the target, or chewing up the substrate below. A crooked entry often looks acceptable from above while the threads are biting unevenly underneath.
That is why setup matters before the trigger is pulled.
Hold the panel, clip, or strip steady so it cannot drift as the screw starts. If you are fastening into thin metal, pre-drilling can help keep the point from walking and reduce distortion around the hole. Keep the drill or driver square to the surface, then run the screw until the head lies flat and even across its full bearing area. If your assembly detail includes a washer, it should compress evenly rather than bulge to one side.
A practical field routine looks like this:
- Verify backing at every planned fastener point. A pancake screw driven into weak wood or off the intended support may feel tight at first but lose holding power early.
- Seat the clip or strip in its intended position. If it shifts during driving, the fastener line can start carrying load off-center.
- Drive straight and at a controlled speed. Fast starts increase the chance of cam-out, head tilt, and stripped threads.
- Stop at snug, flat contact. The head should clamp the part securely without dishing the metal or forcing the clip out of plane.
- Check the row, not just the last screw. Uniform heads usually signal uniform clamping, which is what helps the roof perform consistently over time.
That last check is easy to skip. It is also one of the best ways to catch hidden waterproofing problems before the panel run is finished. If one screw is high, one is overdriven, and one clip is slightly twisted, the roof system will not move or resist uplift evenly.
If you work on accessory structures as well as roofs, this carport roofing material guide is a helpful reminder that panel profile and support conditions change fastener decisions more than many DIYers expect.
Later in the installation, a live demonstration can help crews calibrate their eye. This video is a useful visual aid.
What proper torque looks like
Proper torque is less about a number on the tool and more about the condition of the finished connection. Pancake screws need enough clamping force to hold the clip or strip firmly in place, but not so much that the threads strip, the metal deforms, or the head forces the assembly out of flat contact. A jar lid is a useful comparison here. Too loose and it leaks. Too tight and you damage the threads that were supposed to keep it sealed.
On the roof, under-driving leaves movement where you did not want it. Overdriving can crush the attachment area, reduce thread engagement, or distort the clip so the panel no longer sits the way the manufacturer intended. Those errors do not always show up as an immediate leak. They often show up later as uneven panel behavior, loosened attachment points, or water entry after repeated thermal cycling and wind exposure.
For crews switching between concealed and exposed fastening work, these quick tips for through-fastened panel installation are a useful reminder that the same driver setting does not automatically fit both systems.
A good final habit is to inspect by feel as well as sight. Run a hand across a completed row. A properly installed pancake-head line should feel flat, consistent, and intentional. If one head catches your glove or one clip looks slightly torqued, fix it before the next panel hides the problem.
Common Mistakes to Avoid and Troubleshooting
The most common pancake screw problems aren't dramatic. They're subtle. A head sits a little high. A clip shifts slightly. A line of panels develops a ripple that didn't show up at first inspection.

The errors that cause hidden problems
One repeat mistake is using pancake screws where structural panel attachment is required. That error usually comes from assuming all metal roof screws are close enough if the thread grabs. They aren't. Pancake heads are meant for concealed fastening tasks, not for every load path on the roof.
Another mistake is inconsistent driving pressure. If some screws are snug and others are barely seated, the roof system starts behaving unevenly. One clip holds tight, another has play, and movement accumulates across the panel run.
You'll also see trouble when installers rush through layout and let the screw drift off the intended fastening zone. The screw may still enter material, but not where the system wanted the load transferred.
Fast field checks
When you suspect a problem, start with visual patterns instead of randomly replacing screws.
- Look for uneven seating. A pancake head should lie flat and consistent. A tilted head usually points to crooked entry or poor substrate engagement.
- Check for metal dust. Shiny shavings often mean the screw chewed material during misalignment or stripping.
- Press near clips or seams. Movement can reveal a screw that feels installed but never bit properly.
- Inspect for recurring moisture entry. If leaks cluster around one run, the issue may be a repeated installation error rather than an isolated bad fastener.
For more leak-focused diagnostics, this guide on metal roofing screws leaking is a useful troubleshooting reference.
Don't treat a leak at one fastener as a one-fastener problem until you've checked the pattern around it.
Ordering Specifications and Bulk Quoting Tips
A bulk order can go wrong before the first screw is driven. If the quote request says only “pancake screws for metal roof,” the supplier still has to guess the substrate, coating, length, and exposure level. That guesswork creates one of the quieter roofing risks. The wrong fastener may fit the clip or panel well enough to install, but still miss the long-term target on corrosion resistance, holding power, or consistent seating.
Good ordering language works like a roof plan legend. It removes interpretation.
What to include on a spec sheet
A usable spec sheet should tell the supplier what the screw must do, not just what it is called. Include the head style, the materials being joined, the diameter and length, the coating or corrosion-resistance requirement, and the application. “Concealed-fastener clip attachment to wood deck” is far clearer than “roofing screw.”
Coating language deserves special attention. Pancake screws often sit in places where they are not directly exposed like an exposed fastener, but they still influence roof life. If the coating is mismatched to the jobsite, corrosion can reduce clamping force over time. Once that happens, movement at clips or attachment points can show up as panel shift, noise, or moisture problems that seem unrelated to the original purchase order.
A plain-language spec line might read like this:
Pancake-head screw for concealed-fastener metal roofing application, for metal-to-wood or metal-to-metal attachment as required by substrate, with coating selected for project exposure conditions.
That phrasing gives the buyer and supplier fewer places to misread the requirement.
How to request a bulk quote clearly
Send the quote request in work groups, not as one lump sum. A roof package usually includes more than one fastening task, and each task may call for a different screw length or substrate match. Grouping by use helps the supplier quote the right parts the first time and helps your crew avoid grabbing the wrong box in the field.
A clear request usually includes:
- Project type. Standing seam system, nail strip system, retrofit, repair, or trim package.
- Attachment condition. Metal-to-wood or metal-to-metal.
- Exposure level. Inland, coastal, industrial, or high-humidity environment.
- Estimated quantity by use. Clips, trim details, accessories, and repair overage listed separately.
- Required coating or material. Coated carbon steel, stainless, or another specified finish.
- Packaging preference. Bulk cartons, pails, or labeled line items by area or phase.
Here is the reason this matters. Ordering by total count alone is like ordering all lumber for a house by board footage without separating rafters from blocking. The number may look right on paper, yet the package can still be wrong for the build.
Add one more note if the project has little room for substitution. State whether alternates are allowed. That one sentence can prevent a supplier from quoting a similar pancake screw with a different point style, thread pattern, or coating that changes installation behavior.
Clear quote requests save time, but the bigger benefit is performance control. Correct selection, count, and packaging reduce the chance of field substitutions, mixed fastener types, and rushed install decisions that later show up as uneven panel restraint or water-related callbacks.
Conclusion and Key Takeaways
Pancake screws for metal roofing do one job very well. They create low-profile, broad-bearing fastening points for concealed applications where panel fit, clearance, and waterproofing all depend on the fastener staying out of the way. The trouble starts when installers treat them like a universal roofing screw.
Choose by use case first. Then match coating, diameter, spacing, and torque to the assembly. If you get those details right, the roof has a much better chance of staying flat, dry, and trouble-free over time.
If you're sourcing fasteners, accessories, or comparing options for a concealed-fastener metal roof, Contractor's Den is a practical place to review products, learning resources, and bulk-quote support before your next order.